Thank you again, to everyone who entered our very first giveaway from Cutting Edge Stencils. We have contacted the winner via e-mail. I enjoyed taking a look at everyone’s favorite stencils. There were several that I had never seen before. We look forward to hosting more giveaways in the future.
***
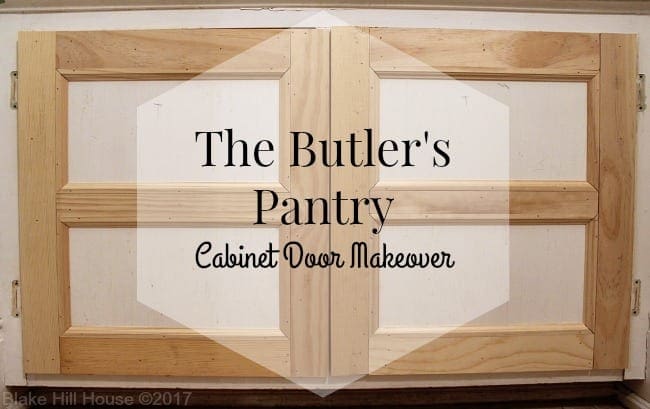
Last weekend was a productive one in the Butler’s Pantry, and the entire room is almost finished.
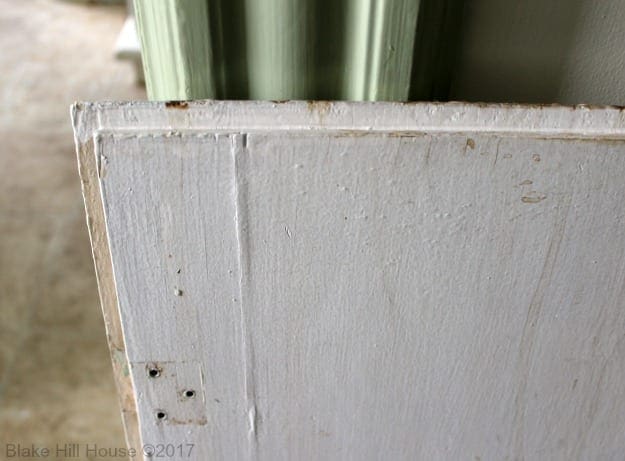
Although one side of the room contains original shaker-style cabinets, the cabinet at the other end of the room was a later addition. The photo below offers a peek at the old doors, and the shiny chrome handles circa 1950.
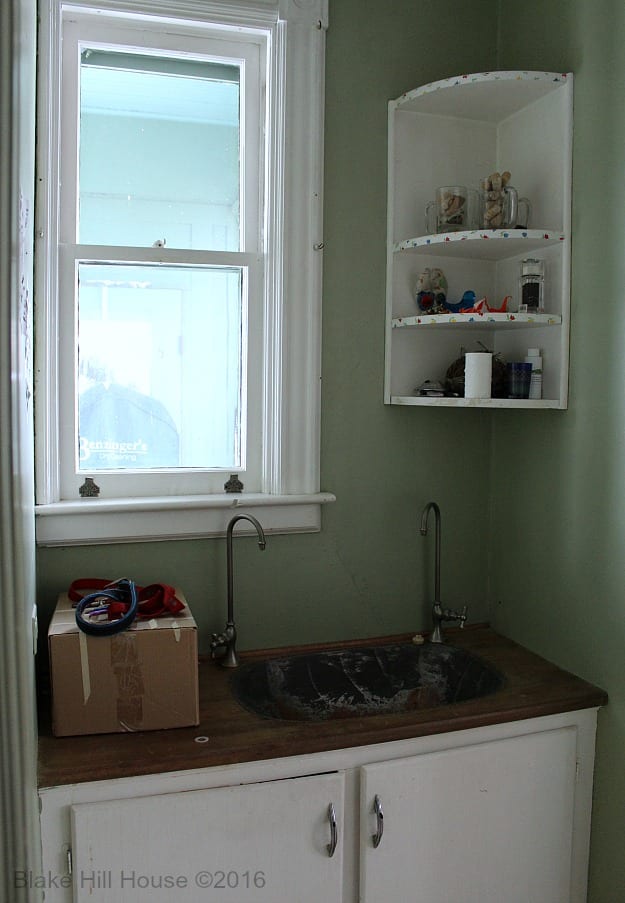
They were okay (ho hum), but not great. In this tiny room, the difference between the cabinets was noticeable, and our original renovation plans included a cabinet door makeover.
Some of you may have followed this project on Instagram Stories. If not, here is a brief run-down of how I built the new door fronts.
Prepping for the New Cabinet Doors
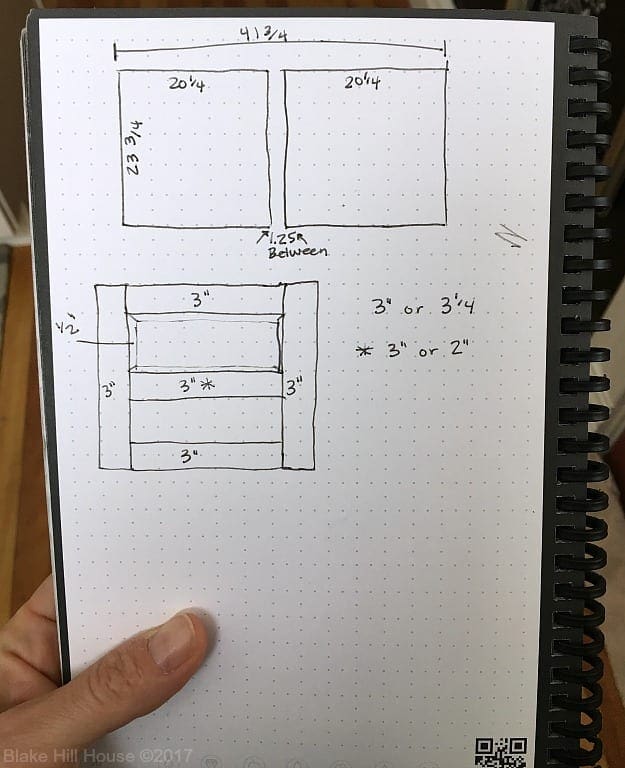
Since this was my first major woodworking project, I decided to draw a picture. The top sketch represented the doors before their makeover. The bottom illustration was the general layout and dimensions of the trim pieces on the original shaker cabinets. I took the drawing to Lowe’s and used it as a reference for purchasing the proper amount of supplies.
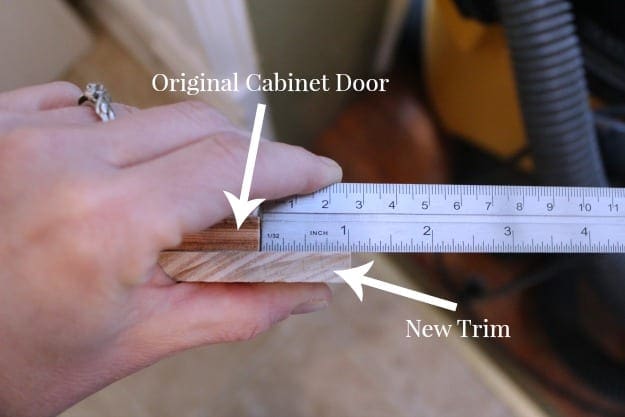
Initially, I thought I would build entirely new doors. However, as I was pricing materials, I realized that I could save money by using the old doors and just adding new trim on the front. Cabinet-quality wood is pricey!
Although it would have been cheaper to get panels of wood and rip them down to the proper widths and lengths that I needed, we do not own a table saw. For time and sanity sake, I picked up pre-cut lengths of 1″ and 2″ pine craft boards which were 3/8″ thick. For the interior trim, Lowe’s only had one style that was 3/8″. I bought that in regular 8′ lengths.
Getting Started
The cabinet doors were pretty gross. I am not even sure how they got so dirty since we never actually used this cabinet or the sink.
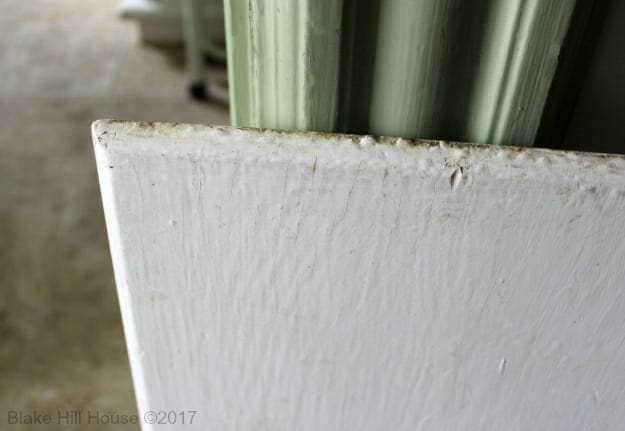
After a good scrub, I took them over to my neighbor’s house. He has a beautiful workshop set-up. Using his table saw, he cut the rounded edges of the cabinet doors off flush with the interior panels. Although that made the doors slightly smaller, the squared off edged provided a better surface for the new trim pieces. I did not get pictures of this process, but you will be able to see the squared off edges in one of the pictures below.
Fake It ‘Til You Make It
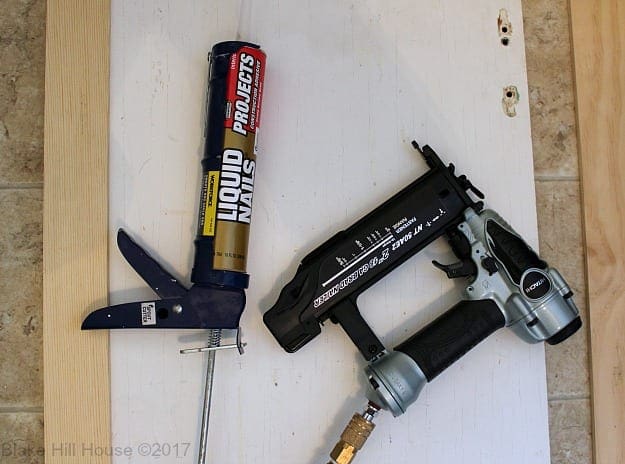
Thus far, I was doing a pretty good job convincing people that I knew what I was doing. The truth was, I had no idea if my plan was going to work. I was working with two new tools, the chop saw and the pneumatic brad nailer. Fortunately, during the day I spent with Habitat For Humanity, I learned the basics of both tools. However, my chop saw and brad nailer were both new in the box, so I had to spend some time reading the directions.
Once I was familiar with the new saw, I began with the straight cuts.

For durability, I used both liquid nails and the brads on the trim pieces around the edges of the cabinet doors.
My plan required a slight adjustment to the trim pieces where the doors came together. The original doors had two inches between them. However, the new plan allowed for the doors to butt up against each other to accommodate one turn latch instead of two cabinet handles. Therefore, the new exterior trim piece overlapped the edge by one inch.
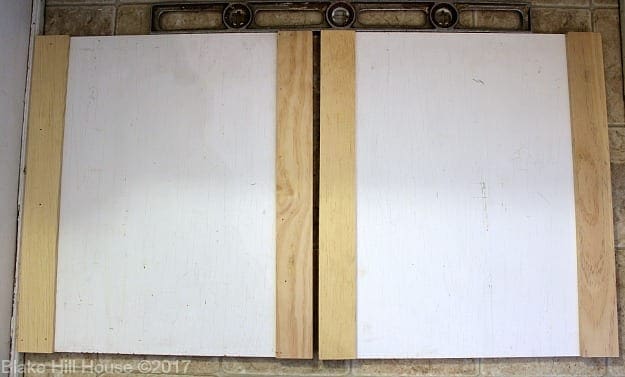
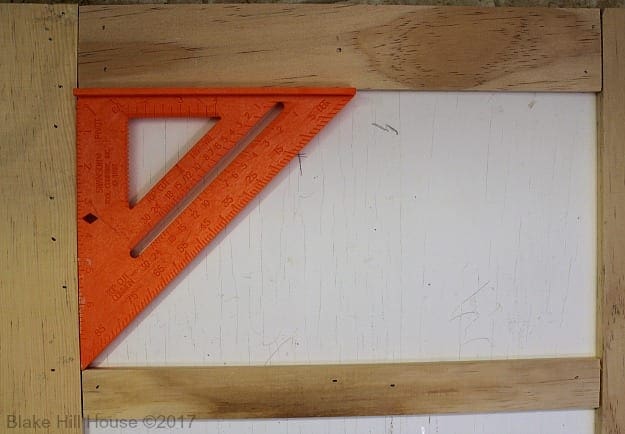
The first day, I finished all of the straight cuts and attached them to the doors. I used a square to make sure that I was placing them at 90-degree angles. Since I am very slow, this took hours.
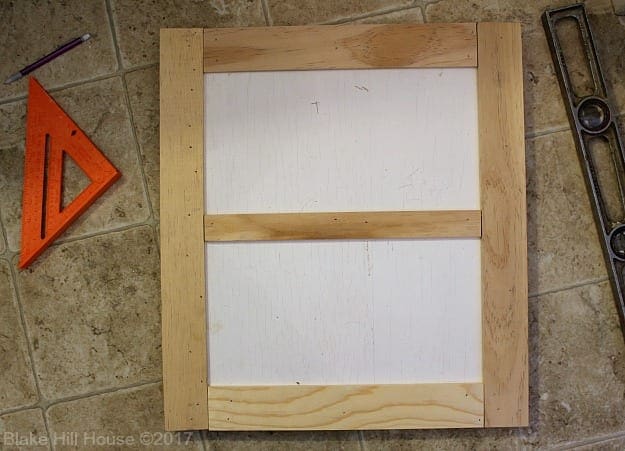
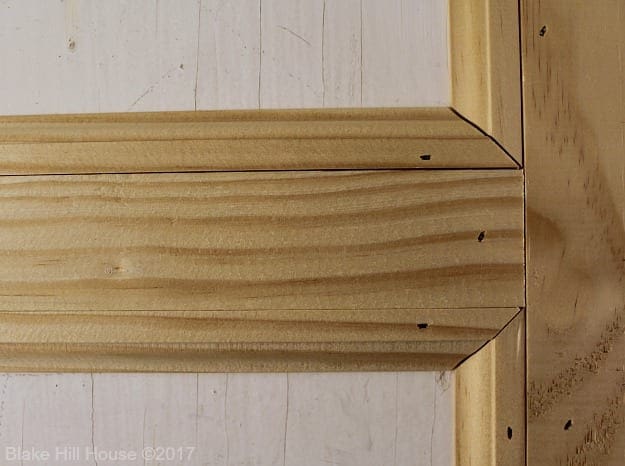
The following day, I cut the interior trim pieces. I was nervous about 45-degree cuts since I was so inexperienced with the chop saw. The first step was measuring the outside edges, then making the miter cuts toward the center.

The cuts were surprisingly simple. I got myself worked up over nothing. The hardest part was the workflow. It took some time for my brain to adapt to the method of cutting and orienting each piece on the chop saw. Once I had that part down, it was smooth sailing. I finished the 45-degree cuts much faster than the straight cuts.
Fastening the interior trim pieces to the cabinet front with the pneumatic brad nailer was a snap.

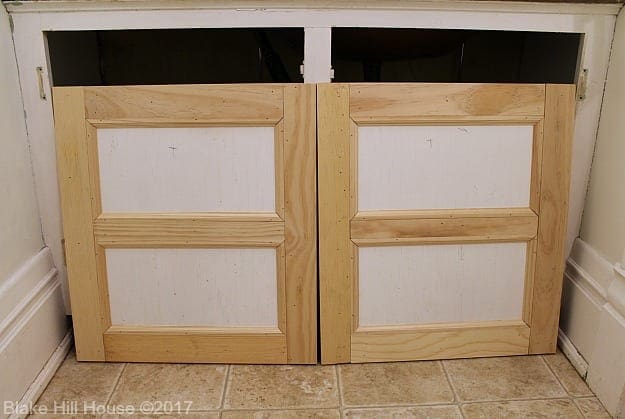
During my Instagram Story, I mentioned that I had some difficulty fitting the doors into the cabinet base. Initially, I was stumped. The cabinet doors were the same size, and the openings were square. Fortunately, I discovered the problem. I forgot to remove two metal latch pieces from the previous handles.
Once I removed those, the cabinet doors slipped right into place.
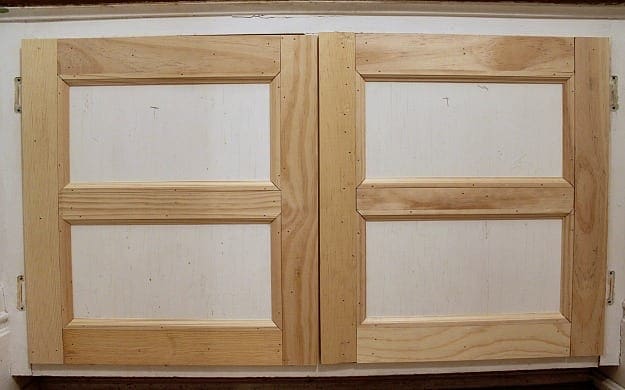
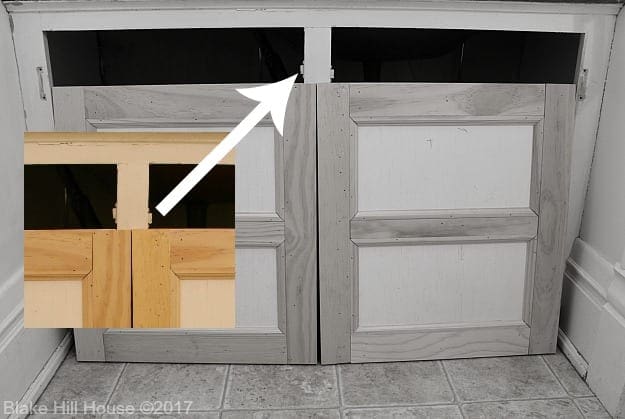
The left side is slightly lower, but I will fix that with the hinge placement. Also, I have a decision to make. I need to decide whether or not to build out the cabinet base 3/8″ to accommodate the new door depth or leave it as-is. When the doors are painted white, it may not be an issue. Does anyone have thoughts? Vintage doors are typically flush with the base. However, modern cabinets often are not. If I leave this as-is, I will have both types in the Butler’s Pantry.
I enjoyed this project. My work was slow as molasses, but I am pleased with the outcome. It was very satisfying.
Next week, I hope to share the big reveal. This week, I am finishing up the last of the painting, and everything should go back into the cabinets this weekend. I cannot wait.


11 Comments
Andrea Matters
You have inspired me with thoughts of what I might do with our hideous 80’s cabinets. They are that white-laminate-with-oak-trim-band sort, and were painted over in an ugly shade of red-brown by a previous owner. What we really need is about $50,000 of kitchen remodeling! But you have given me some ideas for an interim plan. Thanks!
Stacy
New fronts could be a great interim solution. For laminate, you could probably just use the liquid nails and skip the brads. I would love to hear about your project if you decide to do this sort of thing on your cabinets.
Kalila
You are doing a wonderful job! I enjoy following you on instagram as well as facebook. Keep you the good work, and your house is amazing!
Stacy
Thank you so much. <3
Devyn
The doors look great! Once they are filled, primed, and painted, they will look as though they have been there for a long time. Congrats!
Stacy
Thanks, Devyn. It is on my list today. I’m stalling, though. 🙂
Ame Jo
I’d call your first woodworking project a smashing success! Lovin’ that pneumatic nailer.
Stacy
Thanks, Ame. 🙂 I really wish I had the opportunity to use that brad nailer every day. It is a very satisfying piece of equipment. 😀
Andrea Matters
And I just can’t wait to see the completed pantry!
SH
Can’t wait for the reveal with all the befores&afters. But also a little sad it is nearly done. It’s been a fun project for me. For me to follow along, that is 🙂
Stacy
🙂 Thank you, SH. It has been nice to have your support.