Blake Hill House is still having technical difficulties. Our main computer is down, but A. has ordered a part that he expects to solve the problem. With that computer not working, I am unable to edit any photos, so sharing the house tour and the Teen Bedroom progress is on hold until I can use the proper software again. In the meantime, I was able to funnel some outdoor photos that did not need editing, through Andy’s computer and onto the blog. That means that today’s post is all about drainage…again.

For some, drainage may be a boring subject. I have written about it a lot on this blog. (here, here and here) Out of all of the projects at BHH so far, I have felt the most satisfaction after completing a drainage project. Preventative maintenance is so important. We have yet to have a blog reader write to tell us how much he loves our beautiful downspout work, and my neighbors have never once stopped to tell us what a fabulous job we are doing on the gutters, but knowing that we have taken another step towards preserving this historical treasure of a home is all the validation that we need. For those of you reading and thinking, How many more posts can she possibly write on this subject? The answer is so very many. There does not seem to be a shortage of drainage issues to repair here at BHH. No one is more sorry about that than us.
***
As Andy and I were cleaning out the gutters on the porch roof a couple of weeks ago, we found that one of the downspouts was emptying out directly onto the porch roof.
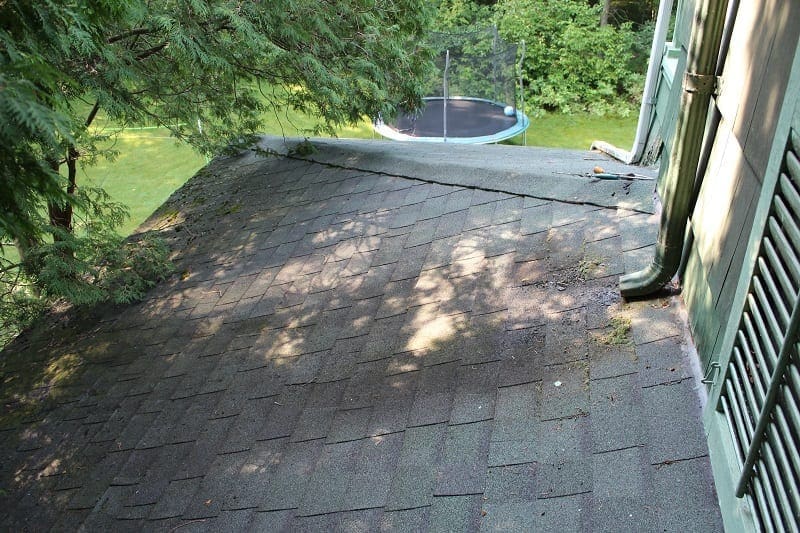
Due to the moisture, there was a lot of moss and other slime growing on the roof. The shingles are actually relatively new, so it was frustrating to see that care had not been taken to preserve that investment.

The first step in the repair process was to gently clean the roof. I used a very mild bleach solution and a stiff brush in order to remove the moss and slime. I do not like using bleach, but I am still working through the last bit that I have on hand. When it is gone, we will switch to hydrogen peroxide and white vinegar for our cleaning needs. No matter which cleaner you choose, always test a small section first. Our composite roof is nothing special or historic, so I was more cavalier when I chose to clean it with bleach. In addition, when you use your stiff brush, be careful not to damage your shingles by scrubbing too vigorously in an uphill direction. You do not want to risk getting the bristles of the brush stuck under a shingle which might break it off or leave the underside exposed to the elements. This is especially true if your shingles are not in good condition.


Once the roof was thoroughly cleaned, I started the repair. I used an aluminum downspout instead of a galvanized mainly because I was doing this project on my own, and the aluminum was much lighter for lifting and maneuvering. It was also a little bit cheaper. At some point, if we choose to restore our roof with a more historically accurate product, we can change out the downspouts easily. I chose brown instead of green so it would blend in with the roof, and it would not be as noticeable at a glance.
The only problem with the aluminum downspout was that I was attaching it to a galvanized downspout. Aluminum is flexible, but galvanized is much more rigid. In addition, aluminum is a little flimsy, and the edges are prone to getting crushed or bent from simply being moved around. After a failed attempt to join the two by hand, I got an idea. I used a clamp to squeeze the galvanized section into a smaller circle.
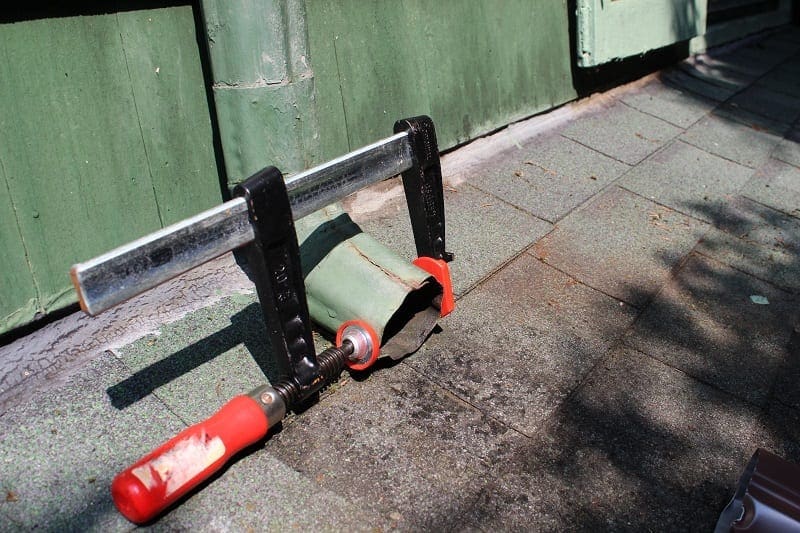
I also slightly flared the edge of the aluminum downspout with a pair of pliers.

Once I did those two things, the two pieces joined together easily. I removed the clamp on the galvanized section, and as it expanded, the union between the two different materials became very strong.

At the other end of the roof, near the gutter, I was about 8 inches short. If you do this project on your own home, you may have too much downspout, and it can easily be cut with a sharp hacksaw or metal snips.
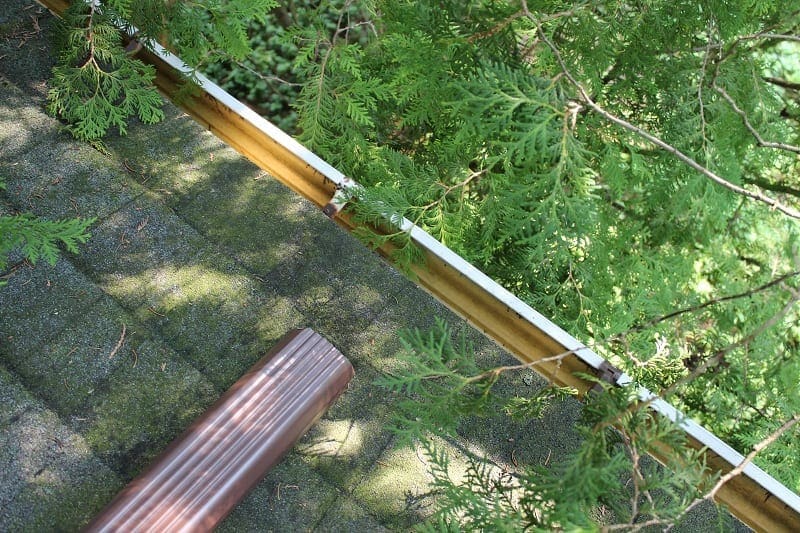
Conversely, you may find that you need an even longer section of downspout. If so, there are plenty of extension, elbow and joiner pieces that you can buy when you purchase your gutters and downspouts. Bring your measurement to the store, and buy accordingly. Because I wanted to avoid cutting and piecing materials when the edge was so close to the gutter, I opted to use an expandable downspout extender. I only need one for this project.

I positioned the extender to empty directly into the gutter. It was a perfect fit.

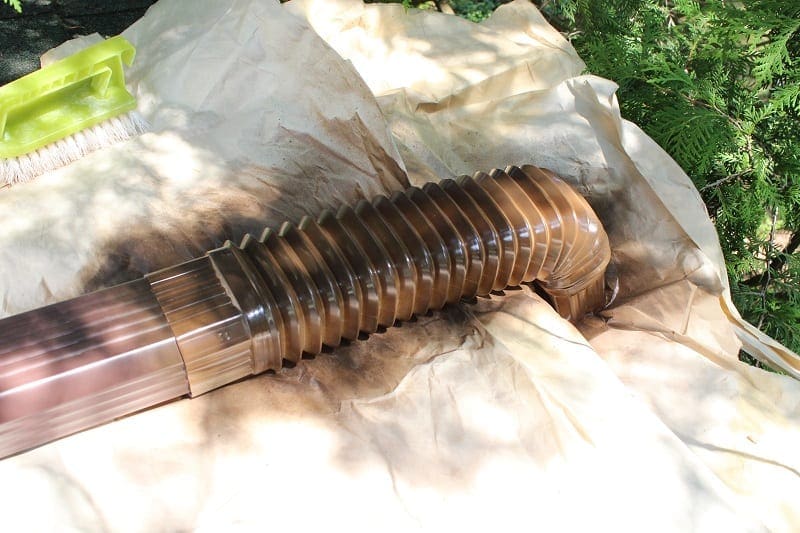
The flexible extenders are also typically available in black and green. My store only had white, so I spraypainted ours with brown spray paint that bonds to plastic. It may or may not hold up, but it was worth a try.
Next, I secured the entire length of the downspout to the roof with two downspout bands.
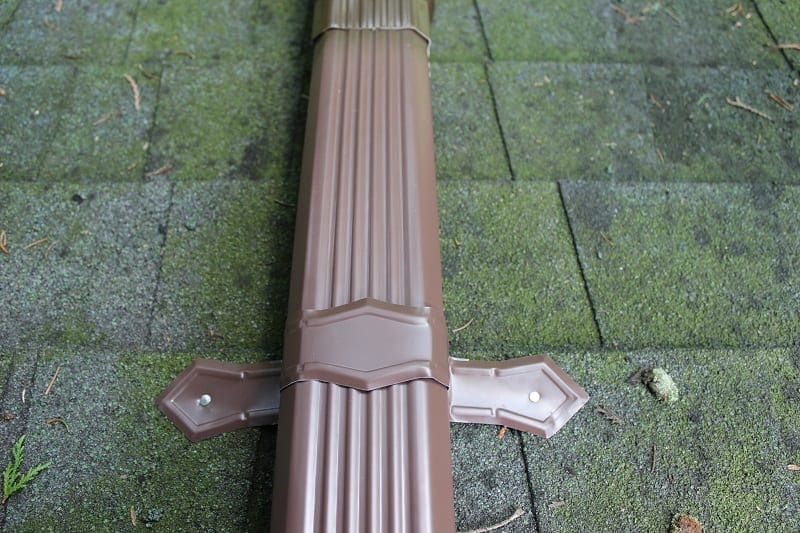
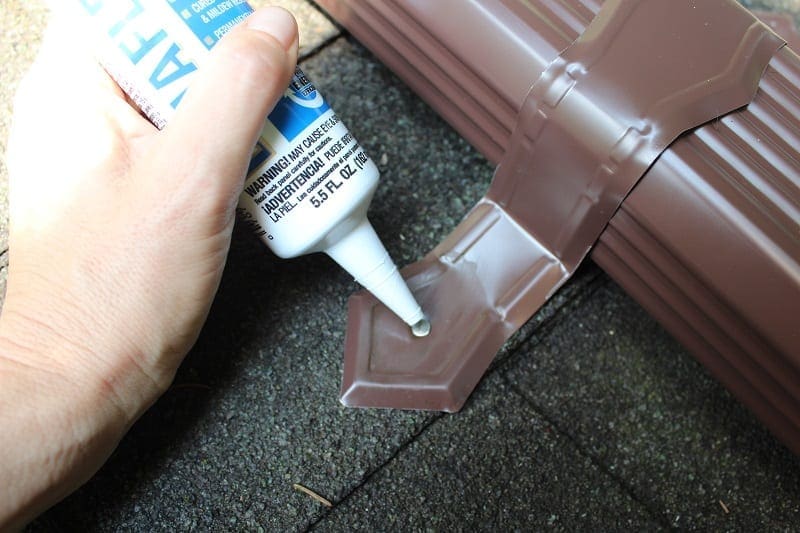
I used a generous blob of clear sealer, approved for use on roofs, on the top of each nail to prevent any moisture from seeping into the hole created by the nail and to discourage rust.
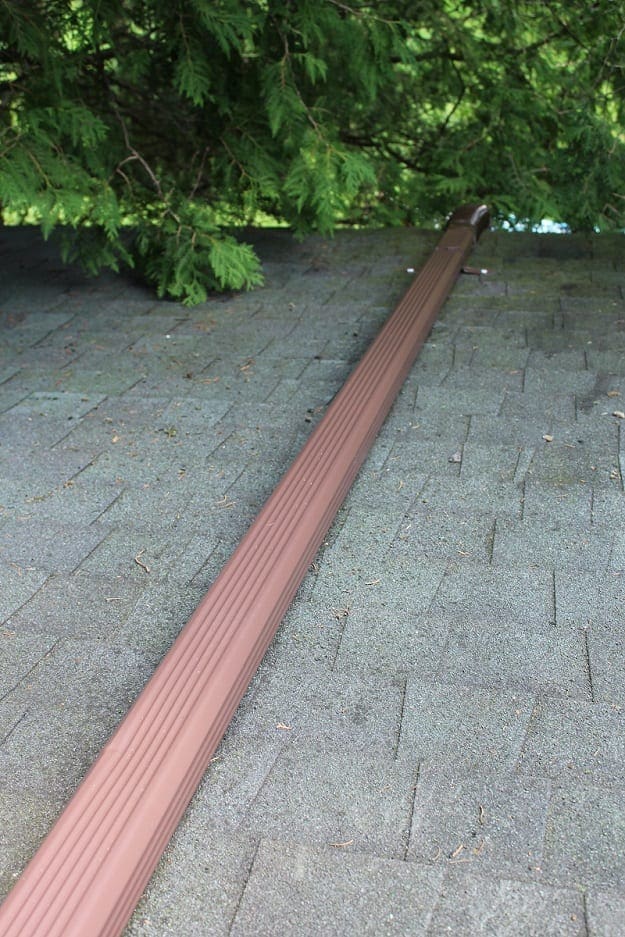
The finished product is functional, and it should divert the drainage nicely. We will have to wait for the next rainstorm to see how it performs, but I expect it to be a lasting and effective fix.
Total cost:: $18

3 Comments
Stef
Good luck with the technical difficulties! I miss reading updates!
stacyfg@gmail.com
We should be up soon! My son, who built the computer, tried a few fixes which took some time. Now, it is in the shop. Hopefully, it will be fixed by next week. I have so many photos and stories to share. 🙂
Jan Elizabeth
I like the detail you bring to the job, such as the sealant over the nail holes. Good idea.