(Teen Bedroom Day 1, Teen Bedroom Day 2)
Andy and I took about a week off from working on the teen’s room. During the second day that we worked on the bedroom, we created the Frankenwall. What followed was several days of very wet weather. It felt like it would never stop raining. Due to the increase in humidity in the house, we decided to let the adhesive dry for a few extra days. The last thing we wanted was to have all that work go to waste by rushing the drying process.
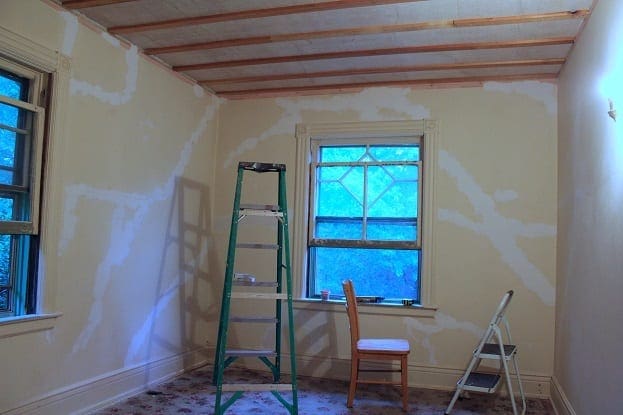
When I finally returned to work on the room, it was time to dismantle the Frankenwall by removing all of the anchor screws:
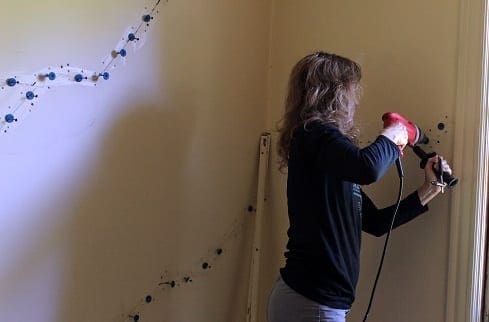
My hands were pretty stiff by the time I removed the last few screws. Andy and I did not count how many anchor screws we put into the wall to hold the adhesive, but I am sure it was a few hundred.
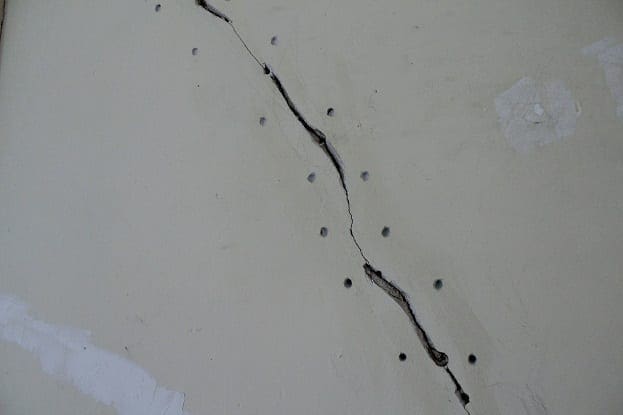
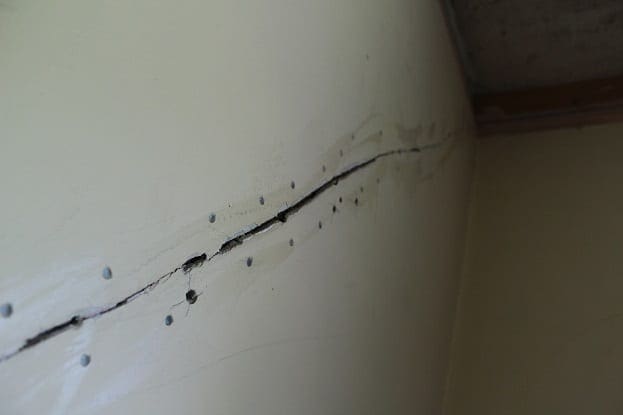
After the screws were removed, I did a thorough cleaning with the shop vacuum. I carefully cleaned out all of the unfilled holes and the cracks themselves. When I was done vacuuming, I realized that fixing plaster this way makes the cracks look much worse before they get better.
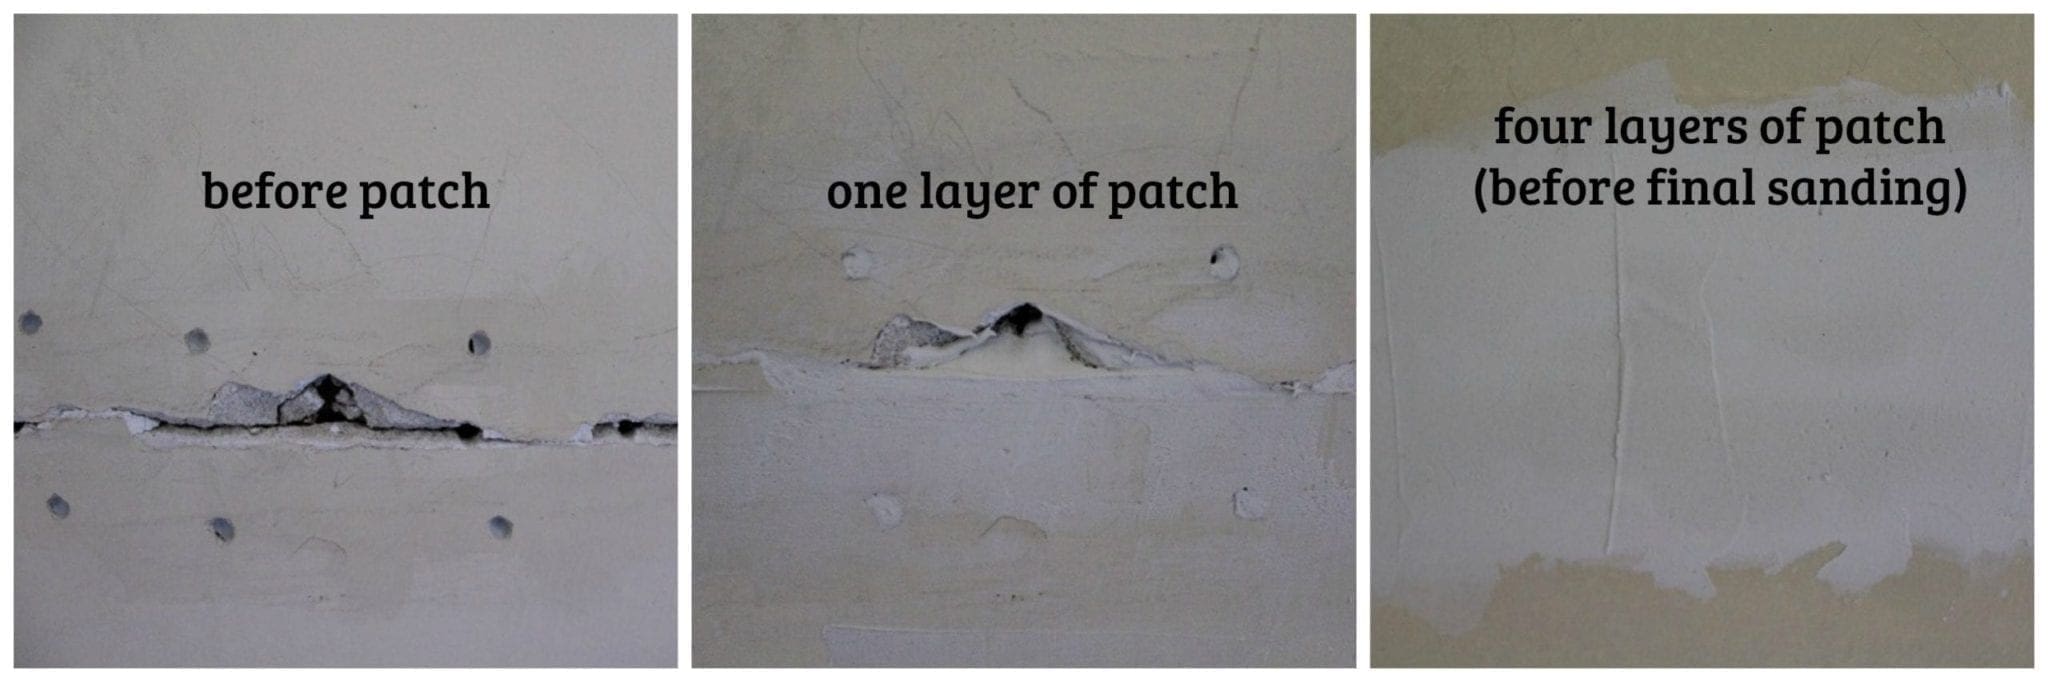
After vacuuming, it was time to patch. I learned how to patch properly by watching our contractor and friend, William. He did many projects on our home in California, and he was always willing to give us his advice when we were in the planning stages of that renovation. Specifically, I learned that you have to patch, sand, clean up and repeat as many times as necessary until the wall is smooth and free of blemishes. In this case, it took four layers of patch to hide all of the imperfections. Patching cannot be rushed by globbing on thick layers. The results will be terrible.
If you use too much patch in one spot, it will leave mounds of patch on the wall that will show up as bumps under the paint. If you sand away too much, there will be a little dimple in the wall where the hole was instead. The trick is to use thin layers, and once they are dry, feather the edges with sandpaper so they are no longer noticeable by touch when you run your hand along the wall. With our walls full of holes and gaping cracks, the pressure was on to do a good job.
As I mentioned it took four layers of patch. I let each layer dry for about a day because of the damp weather. During dry weather, it would have been possible to do two coats of patch per day. Here is the difference between the start and finish. I thought I took a photo of the 2nd and 3rd layers, but I guess I did not. One day I will get this photography thing figured out.
At this point, I have done what I think is the final sanding. However, before I prime and paint, I will inspect all of the cracks once more to make sure that I did not leave any pronounced lumps or edges that will show up under the paint. The room is starting to come together, and by the end of the patching, it looked like this:
Our next bedroom post will be about how we installed the new ceiling. It is a heartwarming story that includes Andy and myself, globs of liquid nails, some friends that may hate us now, and beer.
6 Comments
ALISON
Wee! I am so glad I found you today 🙂 I can’t wait to start at the very beginning!!
stacyfg@gmail.com
Yay! Thanks for stopping by. I love your URL. I will be reading your blog for sure!
Debbie Chmielowiec
I love reading your updates Stacy and cannot wait to “see” how your project turns out. You and your husband are so handy! Shall we call him “Handy Andy”! Hope you are well and can make it out to an EA Runners event soon.
stacyfg@gmail.com
Handy Andy he is! Thanks for reading. I am so sad that I miss all the EA Runners events. If you ever switch days, I’m in.
Jan Elizabeth
That’s looking good! That process takes lots of patience. That would be hard for me 😉
Stacy
Repairing plaster is one of my least favorite DIY projects here at BHH. It really is time-consuming, but the end result is worth it.