Living in BHH is an exercise in patience and self-control. With so much to do, it is easy to get sidetracked. It can be a struggle to stay focused when so many things need a band-aid fix or a complete repair. That is why our best intention to complete two full bedrooms by the end of summer fell flatter than a pancake. Yesterday, I was feeling a little discouraged, but as I was sorting through pictures, I noticed just how many things we have accomplished in the four months that we have been here. So, even though I do not get to share a Pinterest-worthy room reveal with you, we are proud to have one functional, teen-approved room checked off of our to-do list.
***
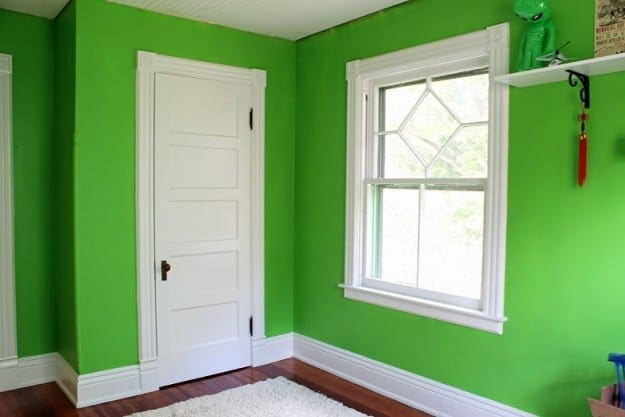
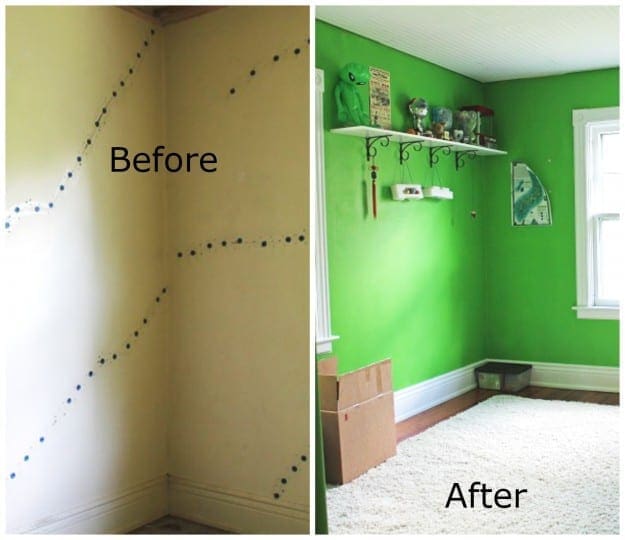
O. loves the color that he chose for his room. Here it is in all of its very bright green glory:
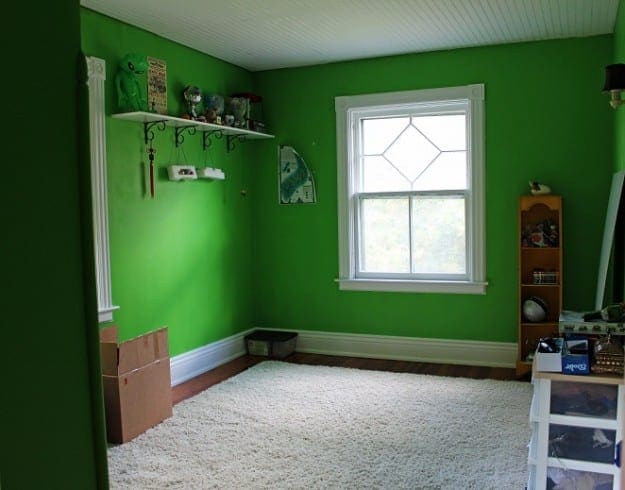
Please note that I photographed the room before his bed was moved into the room. I promise that we do not make him sleep on the rug, even though it is soft enough to make carpet angels in the fluffy shag. We know from experience. O. had few requests, but a soft rug was one of them.
This is the view from the other side of the room. Most of his belongings fit into the closet. If I was very organized and had a magical blogger’s budget, I would be sharing an inside picture of a custom closet, beautifully laid out for maximum efficiency and beauty. Instead, I am sharing a photo with the door tightly closed.
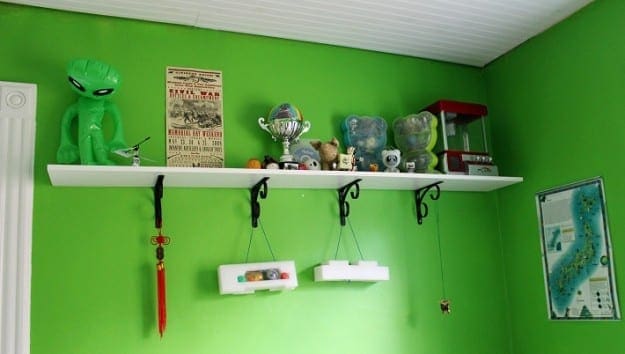
O. is a collector, so he is very happy with this shelf. He likes being able to display some of his favorite items.
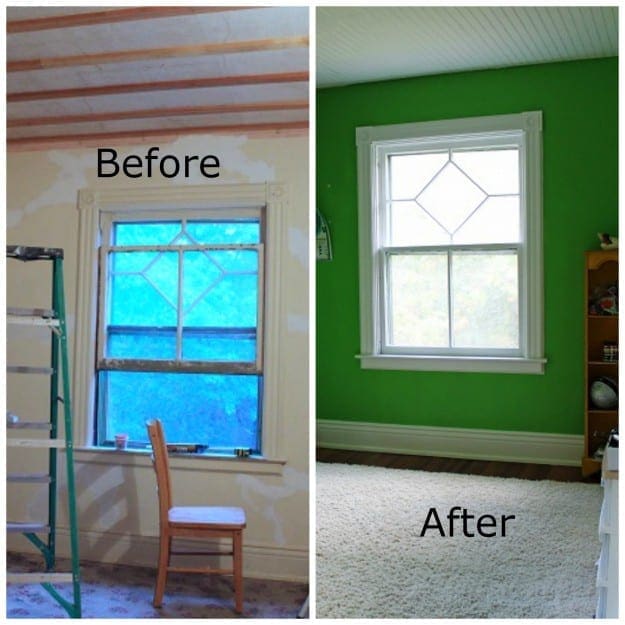
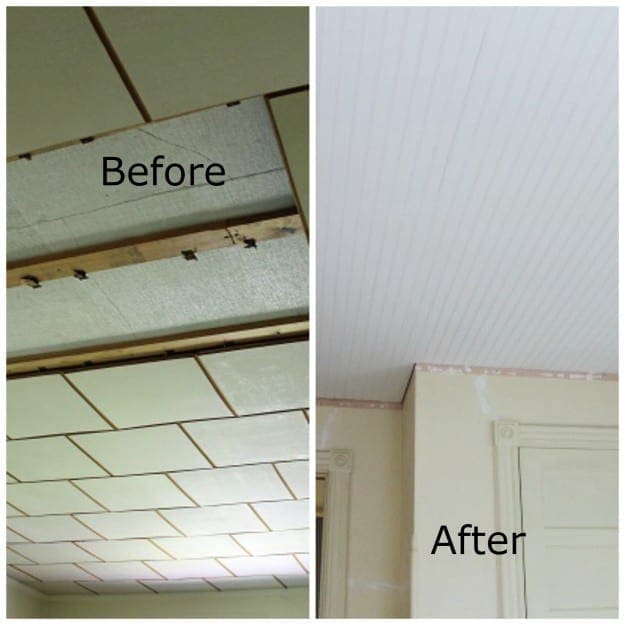
This room was a complete disaster when we moved here. Due to severe water damage, the plaster walls had deep cracks, the false ceiling was caving in, and there was mildew on most of the surfaces. Andy and I struggled with our inexperience. The damp summer weather also increased the time it took for everything to dry at each stage of the restoration. Both of these issues significantly lengthened the timetable for this room renovation. Thank goodness no one hired us to do this project, or we would have been fired for sure.
We still need to reinstall the crown moulding. Because it is original, it is very dry and brittle. When we tried to pound it in with a hammer, the nails began to split the wood, so we stopped immediately. We are waiting until we have a similar project, and then we will rent or buy a finish nail gun which should work much better. In addition, at some point, we will revisit the idea of putting an overhead light with a switch in here. There is only one outlet for the entire room. We do not want to overload it with too many lamps and other electrical devices. The wall sconce creates very little light overall.
Just for fun, I created these before-and-after photos:
Thank you for following along with this project. I know that our inexperience in DIY renovation and blogging was shining brighter than that shade of green paint. We learned so much though, and it should pay off as we attend to the endless projects at Blake Hill House.
To read about the complete teen bedroom restoration, please enjoy these previous entries:
Teen Bedroom: Day 1, Teen Bedroom Day 2: The Frankenwall, Teen Bedroom Day 3: Patch, Sand, Clean up, Repeat, Teen Bedroom Day 4: That’s What She Said, and Teen Bedroom Day 5: Ceiling Finish Work and Paint Prep,
11 Comments
Cathy
looks so clean and fresh and solid! very nice to see.
stacyfg@gmail.com
Thank you Cathy. I know you have a lot of renovation under your belt, so I appreciate your comment. 🙂
Shivon & Mike
We are very impressed by the before and after photos, Stacy and Andy! What a wonderful transformation!
stacyfg@gmail.com
Thank you! We are glad that you got to appreciate the “after” in real life. 😀
Alison
I love it! Doesn’t it feel great to have one room checked off of the ever growing list? 🙂 I also love that green color and how it isn’t Pinterest Perfect, it is REAL.
stacyfg@gmail.com
Thank you. 🙂 You are right. It feels great to have something checked off the list! I am looking forward to your update too.
Kelly
Love it! When we moved into this house my youngest son (15 at that time) decided his room had to be neon blue (if there is such a thing). It still jars my eyeballs every time I walk into his room, lol!
stacyfg@gmail.com
Ha! I promised the kids that they could choose. I may want to eat my words, but I will just put on some sunglasses and visit them in their rooms. 😀 I would like to see that neon blue room.
Kelly
I’m going to try and email it to you. Although, now that I found a picture it’s not as bad as it looks in real life, lol! It just looks so much more blue when you see the whole room. And, I found the cool bagpipe picture for $2.50 at a Thrift Shop. Hopefully my email goes through.
Jan Elizabeth
I love the green with the white. So fresh and vibrant! The crown is going to look great. Have you tried rubbing the wood with coconut oil? It’s supposed to be great for conditioning wood and restoring old and dry wood.
Stacy
I haven’t tried it. That’s a great tip!